One of the most frustrating aspects of Mixed-Level classes is that no matter how hard you try, it can be difficult to create a uniform experience for all levels. Mixed-Level classes are often made up of students who have different backgrounds and abilities. There are many reasons why Mixed-Level classes may exist in your school or studio; however, there are also ways to make Mixed-level Classes more manageable.
As a champion of inclusive, easy-access yoga, Amy Ippoliti highlighted a variety of practical ways to modify poses that are commonly problematic for the general public in her full-day “Yoga For The Long Haul” workshop at Yoga Journal LIVE San Diego. Here, five simple solutions for challenges in all-level classes.
From a teacher’s perspective, the ubiquitous “mixed-level class” can be somewhat of a double-edged sword. On one hand, it offers us the opportunity for growth, as we learn to craft sequences that are both interesting and accessible to a wide variety of yogis; and it challenges us to think on our feet to accommodate injured students who need modifications or a timid beginner requiring extra attention.
On the other hand, public classes often force teachers to contend with huge discrepancies in students’ flexibility. Ever felt a twinge of panic as you scan the room and notice the stiff-as-a-plank athlete, seated right next to an 18-year-old gymnast?
A successful teacher will lead a practice that not only includes but benefits both of these people, without making either deviate from the sequence or compromise the flow of the class. Sound like an impossible feat? Don’t worry: Most mobility issues fall into a few distinct categories, and there are easy fixes that can be applied to a wide variety of scenarios.
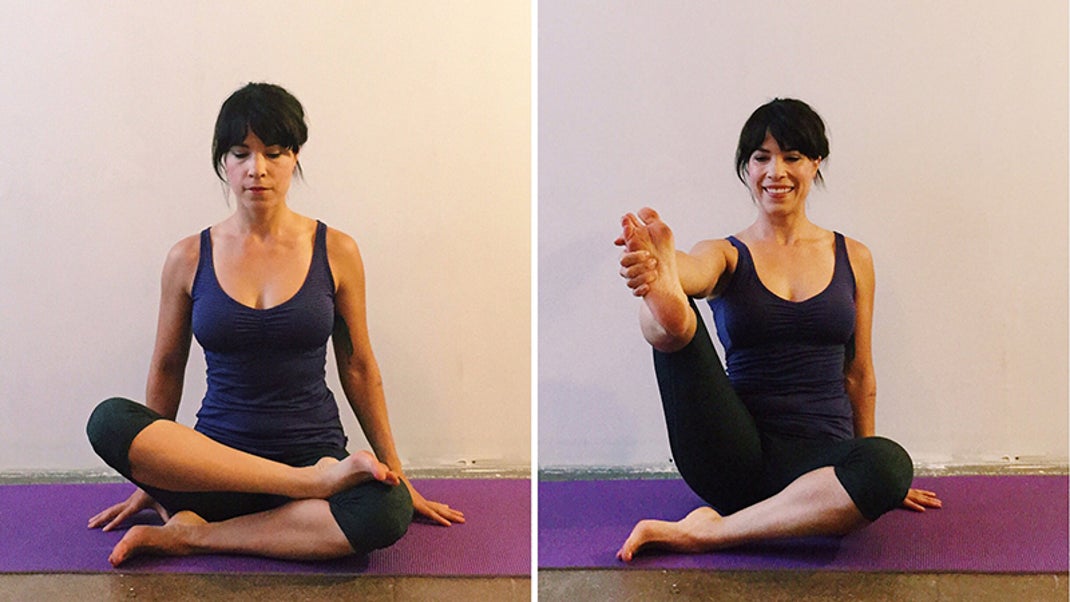
Problem area #1: Rounded spine in seated twists
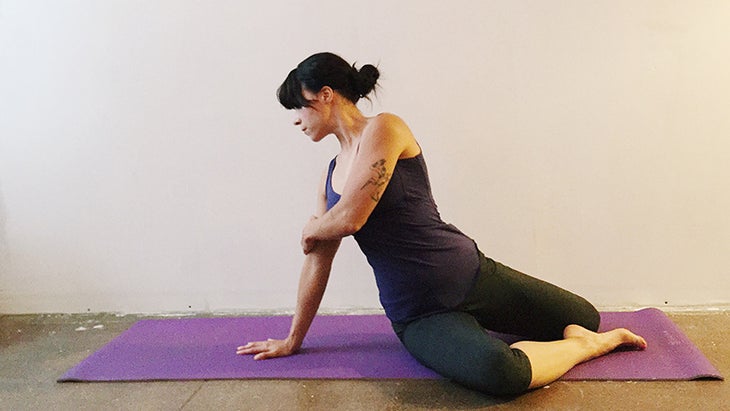
Solution: Swastikasana
For those with stiff hips or tight hamstrings, sitting without slouching can be a real challenge in itself. When starting with less than optimal alignment, the addition of a twist will not only fail to provide the sense of expansion we’re aiming for but might even be injurious.
This delightful pose resolves the issue: The positioning of the legs provides the spine a sort of headstart into the twist, allowing it to lengthen and lift as intended. To quote Ippoliti: “This pose should make you feel bright and majestic, rather than slumped and slouchy.” Similarly, this is a great alternative for those with SI injury or sensitivity, as tipping the pelvis in the direction of the twist can also alleviate pressure in the joint.
Try it:
Bring the right leg out in front, knee bent to 90 degrees, shin parallel to the top of the mat. Position the left shin parallel to the long edge of the mat, knee also at 90 degrees. Put right angles at every joint: the hips, knees, and ankles, creating a pinwheel shape with the legs. Plant the right hand slightly out and behind the right hip. Inhale to lift the crown of the head, exhale to turn the torso to the right. To leverage a deeper twist, grab the right elbow or upper arm with the left hand. Stay and breathe for as long as feels good, then repeat on the other side.
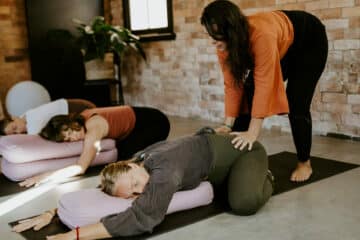
Problem area #2: Hip and knee discomfort in Pigeon
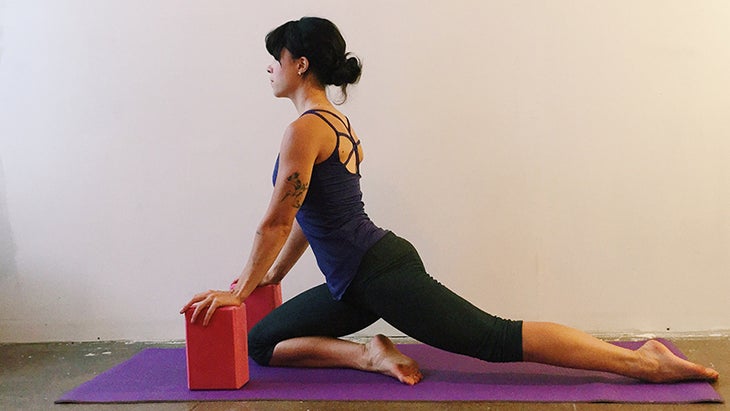
Solution: Prop the pose
“Discomfort in Pigeon Pose is usually caused by one of two things: trouble with fully bending the knee completely or too much external rotation in the hip,” Ippoliti says. This propped-up, milder version of the pose takes care of the flexion while allowing you to monitor how much you externally rotate your hip, yet still provides you with the desired outer hip stretch.
Try it:
From Downward-Facing Dog, bring the right leg forward into Pigeon Pose, but instead of aiming the shin for the front of the mat, keep the heel close to (or even tucked near) the sitting bone. Place both hands on blocks and press yourself up. This takes the weight off the knee and decreases the degree of flexion. Firmly point the right foot, then extend the toes toward the floor. This will engage the lower leg, aligning the shin to keep the knee safe. From here, you can experiment with going lower and flexing the knee more (try an inch at a time), while keeping the lower leg active. Stay for anywhere from 5–10 breaths before repeating on the other side.
Problem area #3: Double Pigeon
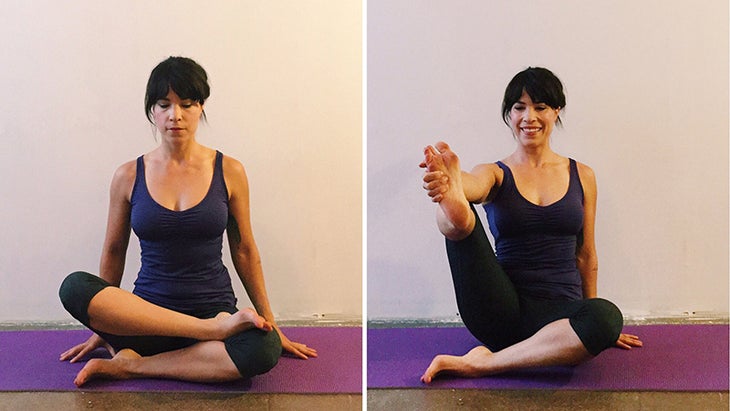
Solution: Mini leg cradle
As if Pigeon weren’t tricky enough, this pose can be a nightmare for anyone with tight hips or sensitive knees. The degree of external rotation available in the hip is determined both by compressive restrictions (the shape of the bones) and tensile limitations (tight muscles), so it’s important not to force anything. As with Pigeon, taking knee flexion and hip external rotation down a notch will bring ease into this pose.
Try it:
This Archer/Baby Cradle hybrid is a natural regression from Double Pigeon, as it reduces the mobility demands on the hip and pressure on the knee. Sit up tall and bring the left shin parallel to the front of the mat. Pick up the right shin and grab hold of the outer edge of the foot. Flex the foot as you lift it, bringing the shin parallel to the floor (or lower if the spine starts to round). Holding the shin, experiment with inching the knee forward, gradually working your way to deeper external rotation, and staying within your edge. For those who tend to slouch in this pose, Ippoliti suggests a reminder to “hinge from the hip rather than the spine, lifting [their] butt up and sending the groins back” to facilitate more length in the spine. Repeat with the left leg, spending a little more time on whichever side feels tighter.
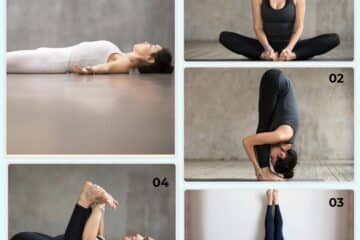
Problem area #4: Achy knees and crunchy lumbar in Supta Virasana
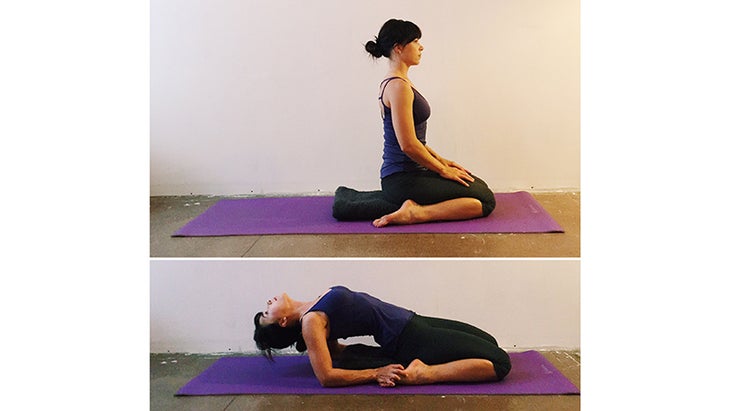
Solution: Prop the pose, engage the feet and spine
Unless you have naturally internally rotated hips, Virasana is a tricky pose. Navigating the reclined version brings its own added challenges. Using props, tweaking alignment, and staying mindful of the body’s limitations makes for an effective but safe stretch.
Try it:
Elevating the hips alleviates uncomfortable compression in the knee: a block or blanket between the heels will work great. Stabilize the lower leg and knee further by hugging the outer ankles in, rather than passively allowing them to sickle and flop outward. For those suffering from a crunchy lumbar in Supta Virasana, Amy suggests arching the lower back, then leaning back: This action “packs the thigh bone into the hip joint, and this stability ultimately helps provide more range of motion,” she says. Once you’ve released as far back as is comfortable (staying propped on the elbows is completely fine if you don’t have a bolster to lie back on), allow the lumbar to lengthen once again by extending the tailbone.
Problem area #5: Crunchy hip in Warrior II and Side Angle
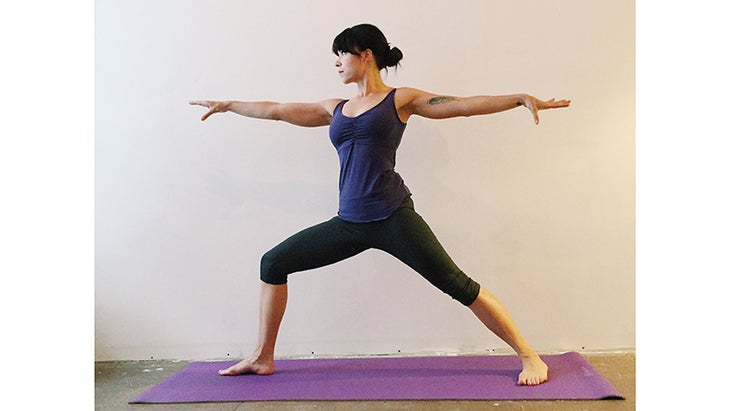
Solution: Fire up the deep stabilizers
Warrior II is intended to make us feel powerful and open, but the common complaint of crunchy compression in the front hip can really mar your enjoyment of what should feel like a gloriously strong pose.
Try it:
First, slightly come up out of your lunge instead of sagging into it. Lift in and up rather than straightening the front leg. This little adjustment alone may create more space and ease in the front of the hip socket. Notice if you’re leaning forward, and bring the torso back so the shoulders are stacked above the hips. Then, energetically lengthen your front knee forward (without actually moving it in space), as though pressing it into someone’s hand. Finally, strongly lift the area between the navel and pubic bone as you allow the sacrum to lengthen toward the floor. A manual assist can be helpful here, provided the student doesn’t mind being touched on their belly. Finally, transition to Side Angle: Stay high in the front hip joint as you lean forward and place the forearm on top of the thigh. Stay for 6–8 breaths before moving to the other side.
About Jenni Tarma
Jenni Tarma is a Los Angeles-based yoga teacher, runner, and Crossbite. She is certified in teaching Yoga For Athletes (via Sage Rountree), is an RRCA Distance Running Coach, and is currently studying with Tiffany Cruikshank for her 500-hour Yoga Medicine certification. She loves to move and believes yoga is the athlete’s key to form, function and focus!
Conclusion:
There you have it: five common problem areas in mixed-level classes and five corresponding solutions. By using props, tweaking alignment, and paying attention to the body’s limitations, you can safely stretch even the tightest muscles and joints. So get out there and start practicing!